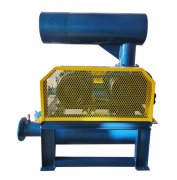
Detailed installation steps and schematic diagram analysis of Roots blower
Since it is not feasible to directly provide the installation diagram of a Roots blower in a text conversation, I can describe a typical installation step and precautions for a Roots blower for you, which usually correspond to the various parts in the installation diagram.
Installation steps of Roots blower
1. Base placement:
Place the base on a flat and sturdy surface, ensuring that it is level and stable.
2. Head installation:
Install the assembled Roots blower head on one side of the base and tighten it with bolts to ensure a secure connection between the head and the base.
3. Motor installation:
Install the motor on the other side of the base, connect it with bolts, and preliminarily tighten it. Be careful not to immediately tighten the lock at this time for future adjustments.
4. Pulley and belt installation:
Install pulleys on the machine head and motor respectively, and use equipment or tools to adjust the pulleys so that they are on the same horizontal plane.
Install the belt and adjust the tightness of the belt to ensure that it is not too loose or too tight during operation.
5. Tightening bolts:
Tighten the bolts of the motor and check the tightness of the belt again to ensure that they are adjusted properly before locking and tightening the bolts.
6. Install the wheel guard:
Install the wheel guard onto the fan and secure it with bolts to protect components such as the fan rotor and belt.
7. Install other accessories:
Install accessories such as inlet silencers, outlet silencers, pressure gauges, valves, etc. as needed. Ensure that these accessories are installed correctly and securely fastened.
8. Power connection:
Invite a professional electrical engineer to connect the motor power supply and ensure that the power connection is correct.
9. Precautions
During the installation process, cleanliness should always be maintained to prevent foreign objects from entering the interior of the fan.
1. Before installation, all components should be inspected to ensure no damage or defects.
2. During installation, the manufacturer's guidance and recommendations should be followed to ensure that the fan can operate normally and achieve the expected results.
3. After installation, a startup check should be carried out to ensure that the fan runs smoothly without any abnormal sounds or vibrations.
4. Although it is not possible to provide an installation diagram directly, the above steps and precautions should help you understand the installation process of the Roots blower. For more specific schematics or guidance, it is recommended to consult the manufacturer's manual for Roots blowers or contact professional installers.


