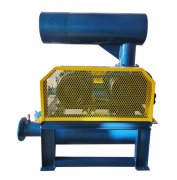
The installation of Roots blower blades (rotors) is a critical step in equipment assembly or maintenance, which directly affects the operational efficiency and lifespan of the blower. The following is a detailed installation process and precautions, applicable to * * two blade or three blade Roots blowers * *:
---
**1、 Preparation before installation**
1. * * Tools and materials**
-Essential tools: torque wrench, dial gauge, copper rod, hydraulic puller, vernier caliper, level gauge.
-Consumables: sealant, lubricating grease (such as molybdenum disulfide), gear oil (ISO VG 220).
-Protection: gloves, goggles.
2. * * Check the components**
-Confirm that the rotor is not deformed, cracked, or worn (with a focus on inspecting the blade end face and shaft neck).
-Clean the interior of the shell to ensure there are no residual metal shavings or dirt.
---
**2、 Installation steps for wind blades (rotors)**
**1. Install the active rotor**
-* * Steps * *:
1. Gently push the active rotor (connected to the motor side) into the housing to avoid collision.
2. Gently tap the shaft end with a copper rod (do not directly tap the blades) to ensure that the rotor is in place.
3. Install the bearing seat and tighten the bolts in diagonal order.
-* * Key Points * *:
-Bearings need to be heated in advance (80-100 ℃) for hot sleeve installation to avoid cold installation damage.
-The inner ring of the bearing must be tightly attached to the shaft shoulder, with an axial clearance of ≤ 0.05mm.
**2. Install the driven rotor**
-* * Steps * *:
1. Shift the phase of the driven rotor and the active rotor blades (90 ° for a two blade fan and 60 ° for a three blade fan).
2. Synchronously adjust the clearance between the two rotors:
-Radial clearance: Measure the clearance between the blade and the shell with a feeler gauge (standard value 0.15~0.25mm).
-Mesh clearance: Use a dial gauge to measure the clearance between the two rotors (usually 0.10~0.15mm).
-* * Key Points * *:
-A gap that is too small can cause friction, while a gap that is too large can reduce air flow efficiency.
**3. Gear assembly and synchronous adjustment**
-* * Steps * *:
1. Mark the initial meshing position before installing the gear (the gear is already paired at the factory, and mixing is prohibited).
2. Tighten the gear lock nut (using a torque wrench, such as M20 nut with a torque of about 150-200N · m).
3. Manually rotate the rotor 2-3 times and check if it rotates synchronously without interference.
-* * Key Points * *:
-Gear mesh clearance is 0.05-0.10mm, use a dial gauge to check the tooth flank clearance.
**4. Sealing and lubrication**
-Installation of shaft seal:
-Apply lubricating grease to the mechanical seal or oil seal and press it in to ensure even spring tension.
-Gearbox oil injection:
-Add gear oil to the centerline of the oil window (excessive amount can cause heating).
---
**3、 Commissioning after installation**
1. * * Manual testing**
-Remove the coupling/belt, manually rotate the rotor, and confirm that there is no jamming or abnormal noise.
2. * * Alignment calibration**
-Direct connection type: The radial/axial deviation of the coupling is ≤ 0.05mm.
-Belt type: The deviation of the centerline of the two wheel groove is ≤ 1mm.
3. * * Trial operation**
-Run without load for 30 minutes, monitor:
-Current (≤ rated value), bearing temperature (≤ 70 ℃), vibration (≤ 4.5mm/s).
---
**4、 Key precautions**
1. The rotor phase must be accurate**
-The two rotors of the two bladed fan should be installed vertically (90 °), while the three bladed fan should be staggered by 60 ° (as shown in the diagram).
2. * * Gap adjustment priority**
-Adjust the radial clearance first, then adjust the meshing clearance, and calibrate the gear.
3. * * Prohibited operations**
-Directly hammering the blades, rotating them in the opposite direction (which can cause blade breakage), and tightening the gear nuts with excessive torque.
4. * * Special requirements for two blade fan**
-Due to the large pulsation, it is necessary to additionally check the anti loosening measures of the foundation bolts (such as adding spring washers).
---
**5、 Common problem handling**
-* * Rotor stuck * *: Check if the clearance is too small or if the gear mesh is incorrect.
-Abnormal noise: recalibrate the rotor phase or gear backlash.
-Leakage: Replace the shaft seal (check the flatness of the dynamic/static ring for mechanical seals).
---
**Illustration Explanation**
-* * Two blade rotor phase * *:
```
Active rotor: ||
Driven rotor: - (rotated 90 ° cross)
```
-Three leaf rotor phase:
```
Active rotor: | ||
Driven rotor: alternate after rotating 60 °
```
---
**Summary**
The core of fan blade installation is precise gap adjustment, phase alignment, and reliable sealing. It is recommended to have professional guidance for the first installation and use the clearance parameters provided by the manufacturer (which may vary among different brands). Regularly checking rotor wear during maintenance (every 6 months) can significantly extend the lifespan of the machine.