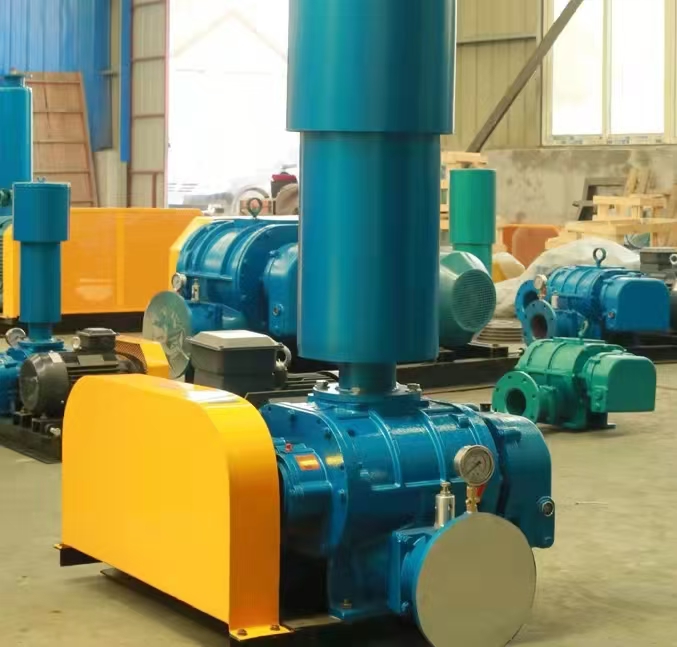
The adjustment of impeller clearance in a two blade Roots fan is a key step in ensuring fan operation, reducing wear and noise. The following are detailed adjustment steps and precautions:
---

**1、 Gap type**
1. * * Radial clearance * *: The clearance between the impeller and the inner wall of the casing.
2. Axial clearance: The gap between the impeller end face and the wall panel (side panel).
3. Inter impeller clearance: The dynamic clearance between two impellers when they mesh.
---
**2、 Adjustment steps**
**1. Preparation work**
-* * Shutdown and Power Off * *: Ensure that the fan stops, cut off the power, and hang a warning sign.
-Disassembly and Inspection: Open the casing, clean the impeller and impurities inside the casing, and check for wear.
-* * Measuring tools * *: Prepare measuring tools such as feeler gauges, dial indicators, micrometers, etc.
**2. Radial clearance adjustment**
-The standard value is usually 0.15~0.40mm (refer to the manufacturer's manual for details).
-* * Method * *:
1. Use a feeler gauge to measure the gap between the top and sides of the impeller and the casing.
If the clearance is too large, it can be adjusted by adjusting the position of the bearing seat or repairing/replacing the impeller; If the gap is too small, check whether the impeller is eccentric or the casing is deformed.
3. After adjustment, manually turn the wheel and confirm that there is no friction.
**3. Axial clearance adjustment**
-* * Standard value * *: usually ranging from 0.10 to 0.30mm (depending on the size of the fan).
-* * Method * *:
1. Use a dial gauge to measure the gap between the impeller end face and the wall panel.
2. Adjust by increasing or decreasing the thickness of the bearing end cap gasket or adjusting the bearing positioning sleeve.
3. Ensure even clearance on both sides to avoid axial movement of the impeller.
**4. Adjustment of clearance between impellers**
-* * Standard value * *: usually 0.20-0.50mm (dynamic mesh clearance).
-* * Method * *:
1. Adjust the two impellers to a horizontal position (45 ° or 90 ° meshing state).
2. Measure the gap between the two impellers at the meshing point with a feeler gauge.
3. Adjust the bearing seat positions of the two impellers synchronously (move synchronously to avoid misalignment).
4. Manually rotate the impeller multiple times to confirm that there is no blockage and the clearance is uniform.
**5. Verification and trial operation**
-Check for friction or abnormal noise during manual turning.
-Tighten all bolts and restore the casing and pipelines.
-No load test run, monitor whether vibration, noise, and current are normal.
-After the load is running, retest the gap and adjust it if necessary.
---
**3、 Precautions**
1. * * Synchronous adjustment * *: When adjusting the clearance between the impellers, the two impellers need to move synchronously to avoid damaging the meshing line.
2. * * Temperature compensation * *: Consider the impact of thermal expansion on the gap during operation (the cold gap needs to be appropriately enlarged under high temperature conditions).
3. * * Bearing clearance * *: Check if the bearing clearance is normal, as excessive clearance can cause the impeller to shake.
4. * * Marking Alignment * *: Mark the relative position of the gear and impeller before disassembly to ensure accurate meshing of the synchronous teeth during assembly.
5. Lubrication: After adjustment, add lubricating grease to avoid dry friction.
---
**4、 Common problem handling**
-* * Insufficient clearance * *: causing friction and heating of the impeller, requiring readjustment or inspection of bearing wear.
-Excessive clearance: Decreased air volume and efficiency, requiring replacement of worn parts or adjustment of bearing seats.
-Abnormal noise and vibration: It may be due to poor gear meshing or uneven clearance, and the gear alignment needs to be rechecked.
---
**5、 Maintenance suggestions**
-Regularly check the gap (every 3-6 months), especially when transporting dust media.
-Use original accessories to ensure the machining accuracy of the impeller and casing.
-Record each adjustment data for tracking wear trends.
For more specific parameters, please refer to the equipment manufacturer's manual or contact technical support. If there is a lack of experience during adjustment, it is recommended to have professional personnel perform it to avoid damaging the equipment.


