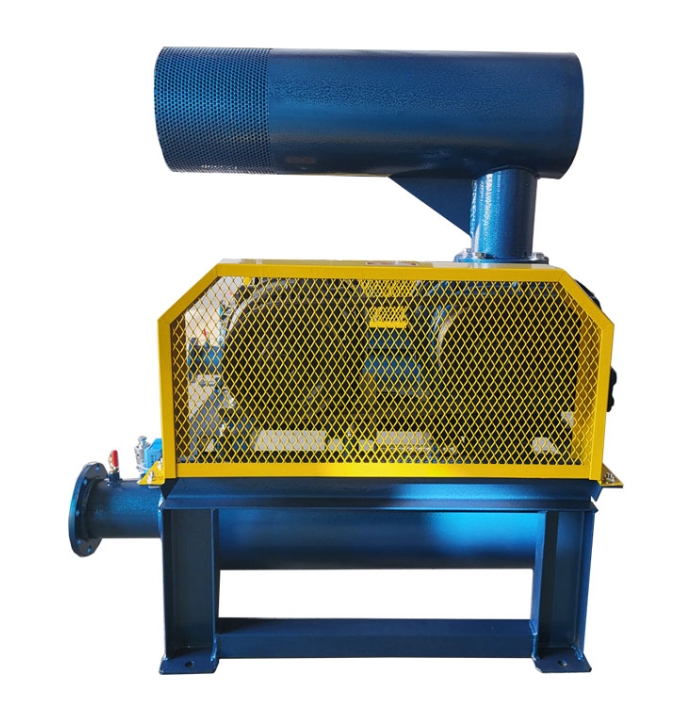


**Full process guide for maintenance of rotary fan (Roots blower)**
**(including disassembly and assembly steps, key parameters, and common fault handling)**
---
**1、 Preparation before maintenance**
1. * * Measures**
-Power off and lock (LOTO), release pipeline pressure, and hang warning signs.
-Wear protective equipment (gloves, goggles, earplugs).
2. * * Tool List**
-* * Essential tools * *: hydraulic wheel puller, torque wrench, dial gauge, plug gauge (0.02mm accuracy), copper rod.
-Consumables: sealant (temperature resistant to 200 ℃+), molybdenum disulfide grease, cleaning agent (no residue).
3. * * Fault diagnosis**
-Record abnormal phenomena (abnormal noise, vibration, temperature, current fluctuations).
-Measurement of key parameters:
-Vibration value (≤ 4.5 mm/s, ISO 10816 standard).
-Bearing temperature (normal ≤ 75 ℃).
---
**2、 Disassembly steps**
1. * * Remove external attachments**
-Disconnect the coupling/belt and mark the alignment position.
-Remove the flange bolts of the import and export, and move the pipeline away (pay attention to the protection of the sealing gasket).
2. * * Separate gearbox**
-Remove the gearbox cover bolts and check the gear mesh markings (if there are no markings, they need to be marked by yourself).
-Use a puller to pull out the gear (protect the shaft end thread).
3. * * Lift off the casing**
-Remove the split bolts and use a top screw to open the upper and lower casings (to avoid damaging the sealing surface).
-Lift the upper casing (weight ≥ 50kg requires two people to cooperate).
4. * * Remove the rotor (impeller) assembly**
-Remove the bearing seat bolts and gently tap the shaft end with a copper rod to remove the rotor (avoid direct hammering).
---
**3、 Key component inspection and maintenance**
|* * Components * * | * * Inspection Standards * * | * * Maintenance Methods * *|
|----------------|------------------------------|------------------------------------------|
|* * Rotor * * | Radial clearance ≤ 0.3mm, wear ≤ 1mm | Welding repair (EDCrMo electrode) or replacement (dynamic balance G2.5 level)|
|* * Gear * * | Tooth surface pitting<5, side clearance 0.1~0.15mm | Polishing or paired replacement (synchronous gear pairing required)|
|* * Bearing * * | Clearance ≤ 0.05mm, no peeling | Heating disassembly (≤ 120 ℃), cold installation of new bearings (SKF/NSK)|
|* * Sealing * * | No hardening or cracking | Replace the skeleton oil seal/mechanical seal (install with lubricating grease)|
---
**4、 Assembly and Adjustment**
1. * * Adjustment of rotor clearance**
-Radial clearance: Measure with a feeler gauge (standard 0.15~0.25mm) and adjust through the bearing seat gasket.
-Axial clearance: dial gauge (standard 0.10~0.20mm), adjust the torque of the locking nut (M20 nut 150-200 N · m).
2. * * Gear meshing calibration**
-Align the gears according to the markings, with a tooth backlash of 0.10~0.15mm (verified by wire indentation method).
-Contact spot ≥ 60 tooth height, ≥ 50 tooth length.
3. * * Sealed installation**
-Apply a small amount of lubricating grease to the sealing surface to avoid flipping or twisting (mechanical seals need to check the flatness of the static ring).
---
**5、 Debugging and acceptance**
1. * * No load test (30 minutes)**
-Click to confirm the steering direction (consistent with the arrow on the shell).
-Check:
-Current fluctuation ≤ ± 5 rated value.
-Bearing temperature ≤ 75 ℃.
-Vibration value ≤ 4.5 mm/s (exceeding the standard requires re balancing).
2. * * Load operation (2 hours)**
-Gradually increase the pressure to the working pressure and verify:
-The air volume deviation is less than ± 3 (compared to the nameplate).
-No abnormal noise/leakage (using a listening stick to detect gear noise).
---
**6、 Common Fault Handling Table**
|* * Fault phenomenon * * | * * Possible cause * * | * * Solution * *|
|------------------|---------------------|----------------------------------|
|Insufficient air volume | Excessive rotor clearance/Belt slippage | Adjust the clearance to 0.2mm or replace the belt|
|Excessive vibration * * | Bearing damage/poor alignment | Replace bearing+laser alignment (error ≤ 0.05mm)|
|* * Gear abnormal noise * * | Gear surface wear or insufficient lubrication | Replace gear+grease (ISO VG220)|
|* * High temperature * * | Poor lubrication/overpressure operation | Add oil or check system resistance|
---
**7、 Precautions after maintenance**
1. * * First run * *: Replace the gear oil after 50 hours (remove running in debris).
2. * * Regular maintenance * *:
-Change the oil every 2000 hours and check the rotor dynamic balance every 5000 hours.
-Check the seal leakage every month (mechanical seal leakage ≤ 5 mL/h).
3. * * Long term disuse * *: Drain the cooling water (for water-cooled models) and apply anti rust grease to the shaft end.
---
**Attachment: Key Torque Parameters**
-Shell bolts: Tighten in diagonal order (refer to the manufacturer's manual, usually M12 bolts 40~50 N · m).
-Coupling bolt: coated with thread glue, torque 80-100 N · m (M10 specification).
---
**Tip * *:
1. It is recommended to return complex repairs (such as rotor dynamic balance correction) to the factory or have them carried out by professionals.
2. Keep maintenance records (including gap values and replacement part models) for future tracking.
3. * * Strictly prohibit overpressure operation * *: The valve popping pressure must be set to 1.1 times the working pressure!
If you need a specific model of maintenance manual, please provide the fan brand and parameters (such as flow rate and pressure).